Thursday, September 20, 2012

Integrating Facebook in iOS6


Apple unveiled iOS6 . It has a great impact on FB user, and obviously to the developers. Tried my hand to integrate this in my app and sharing my experience. I think this will help many people a lot.


1. In order use the Facebook we need to add the Facebook framework to our project. Select your project in the project navigator and then the project target. Go to the Build Phases tab and click on the + button inside the Link Binary With Libraries section, on the window that appears navigate to the Social.framework file and click Add.

2.  Open the controller file and add :

#import "Social/Social.h"
These two steps are necessary to integrate Facebook. Apart from these we need to set Facebook credentials in the settings on iPhone initially.

After that we need to write code for post on wall.

1.     POST TEXT:


if([SLComposeViewController isAvailableForServiceType:SLServiceTypeFacebook])    {
        SLComposeViewController *faceBookSheet=[[SLComposeViewController alloc] init];
        // Sets viewcontroller to FB type
        faceBookSheet=[SLComposeViewController composeViewControllerForServiceType: SLServiceTypeFacebook];
        //Calls the function for set Text
        [faceBookSheet setInitialText:@"Initial Text from iOS 6 facebook Demo"];
        // Specifying a block to be called when the user is finished. This block is not guaranteed
        // To be called on any particular thread. It is cleared after being called.
        [faceBookSheet setCompletionHandler:[self setComplitionHandlerFunction]];
        //Presenting the FB sheet
        [self presentViewController:faceBookSheet animated: YES completion: nil];
        // presentModalViewController is deprecated in iOS 6.
        [faceBookSheet release],faceBookSheet=nil;
        
    }

A special function is required which handles the event when user is finished.


 [faceBookSheet setCompletionHandler:[self setComplitionHandlerFunction]];  

Inside the setComplitionHandlerFunction:

SLComposeViewControllerCompletionHandler resultFB = ^(SLComposeViewControllerResult result) {

        NSString *output;
        switch (result) {
            case SLComposeViewControllerResultCancelled:
                output = @"ACtionCancelled";
                break;
            case SLComposeViewControllerResultDone:
                output = @"Post Successfull";
                break;
            default:
            break;
        }

        UIAlertView *alert = [[UIAlertView alloc] initWithTitle:@"Facebook Complition Message" message:output delegate:nil cancelButtonTitle:@"Ok" otherButtonTitles:nil];
        [alert show];
        [alert release];
    };
    return resultFB;

2.     POST IMAGE:

if([SLComposeViewController isAvailableForServiceType:SLServiceTypeFacebook])    {
        SLComposeViewController *faceBookSheet=[[SLComposeViewController alloc]init];

        faceBookSheet=[SLComposeViewController composeViewControllerForServiceType:SLServiceTypeFacebook];

        [faceBookSheet addImage:[UIImage imageNamed:@"yourImage.png"] ];

        [faceBookSheet setCompletionHandler:[self setComplitionHandlerFunction]];

        [self presentViewController:faceBookSheet animated:YES completion:nil];
        [faceBookSheet release],faceBookSheet=nil;
    }


3.     POST URL:


if([SLComposeViewController isAvailableForServiceType:SLServiceTypeFacebook])    {

        SLComposeViewController *faceBookSheet=[[SLComposeViewController alloc]init];

        faceBookSheet=[SLComposeViewController composeViewControllerForServiceType:SLServiceTypeFacebook];

        NSURL *url=[NSURL URLWithString:@"http://www.google.com"];

        [faceBookSheet addURL:url];
        [faceBookSheet setCompletionHandler:[self setComplitionHandlerFunction]];

        [self presentViewController:faceBookSheet animated:YES completion:nil];

        [faceBookSheet release],faceBookSheet=nil;
    }


Tuesday, August 7, 2012

Shadow effects using custom CALayer shadowPaths

I recently had to improve the performance of a few views that utilized CALayer-based shadows on rounded-rect UIView objects. On this particular iPad application, when the device was rotated, the views rotated quite a lot slower than we would have hoped. It wasn’t a show-stopper, but the jerky rotation animation made it look cheap and unpolished. The easiest way to have our cake, and eat it too, was to set a custom CGPath to the layer’s shadowPath property. This told UIKit to set the inside of the path to opaque, reducing the amount of work the rendering engine needed to perform.


// Add background tile
UIImage *bgImage = [UIImage imageNamed:@"embedded_bg.png"];
self.view.backgroundColor = [UIColor colorWithPatternImage:bgImage];
// Add the reference view
UIImage *image = [UIImage imageNamed:@"dccp.jpeg"];
UIImageView *imgView = [[UIImageView alloc] initWithImage:image];
[self.view addSubview:imgView];
imgView.center = self.view.center;
imgView.layer.shadowColor = [UIColor blackColor].CGColor;
imgView.layer.shadowOpacity = 0.7f;
imgView.layer.shadowOffset = CGSizeMake(10.0f, 10.0f);
imgView.layer.shadowRadius = 5.0f;
imgView.layer.masksToBounds = NO;
UIBezierPath *path = [UIBezierPath bezierPathWithRect:imgView.bounds];
imgView.layer.shadowPath = path.CGPath;
[imgView release];


The resulting image, as you can see above, has a shadow as you’d expect. But since we’ve declared the shape the path will have, the iPad can drastically improve its rendering performance.
Through that process however, I decided to see what sort of effects I could pull off by passing in a path other than the default rectangular bounds of the layer. Since you can create any sort of path you want, I considered the different effects I could get away with by making non-rectangular paths and using them as shadows.

Trapezoidal CGPath


Trapezoidal shadow providing the illusion of depth
By carefully drawing a trapezoidal shape below and slightly beneath the view, you can give the illusion of depth.

CGSize size = imgView.bounds.size;
UIBezierPath *path = [UIBezierPath bezierPath];
[path moveToPoint:CGPointMake(size.width * 0.33f, size.height * 0.66f)];
[path addLineToPoint:CGPointMake(size.width * 0.66f, size.height * 0.66f)];
[path addLineToPoint:CGPointMake(size.width * 1.15f, size.height * 1.15f)];
[path addLineToPoint:CGPointMake(size.width * -0.15f, size.height * 1.15f)];

Elliptical CGPath


Elliptical shadows create the illusion of a top-down light source
Just like the trapezoid, there are other effects you can achieve by playing with simple shapes for the use of creating shadows.

CGRect ovalRect = CGRectMake(0.0f, size.height + 5, size.width - 10, 15);
UIBezierPath *path = [UIBezierPath bezierPathWithOvalInRect:ovalRect];


Paper-curl effect


Paper curl example using a curved path
By using a control point on a bezier curve, you can make the bottom side of the shadow curve inward, making it appear like the view is printed on paper that has been curled inward.

CGSize size = imgView.bounds.size;
CGFloat curlFactor = 15.0f;
CGFloat shadowDepth = 5.0f;
UIBezierPath *path = [UIBezierPath bezierPath];
[path moveToPoint:CGPointMake(0.0f, 0.0f)];
[path addLineToPoint:CGPointMake(size.width, 0.0f)];
[path addLineToPoint:CGPointMake(size.width, size.height + shadowDepth)];
[path addCurveToPoint:CGPointMake(0.0f, size.height + shadowDepth)
controlPoint1:CGPointMake(size.width - curlFactor, size.height + shadowDepth - curlFactor)
controlPoint2:CGPointMake(curlFactor, size.height + shadowDepth - curlFactor)];

More possibilities than can be covered

There are plenty of other possibilities, more than can be covered here. Creating CGPathRef objects, either using UIBezierCurve or by using Quartz2D drawing methods, can easily step through composing shadows. Use a CGAffineTransform object to manipulate your path to stretch, scale, or rotate it as needed. Once you realize what your possibilities are, you can add an extra degree of polish to your application with very little effort.
If you want to play with the source use to create these examples, make sure you download the ShadowTest.zip

Sunday, July 1, 2012

Face Detection using CIDetector (Note: Works with ios 5.0 and later)

The face detection API is surprisingly simple to use. It really boils down to two classes: CIDetector and CIFaceFeature. CIDetector is responsible for performing the analysis of an image and returns a collection of CIFaceFeature objects describing the face(s) found in the image. You begin by creating a new instance of CIDetector using its detectorOfType:context:options class method.
CIDetector *detector =
    [CIDetector detectorOfType:CIDetectorTypeFace context:nil options:options];
CIDetector can currently only be configured to perform face detection so you’ll always pass the string constant CIDetectorTypeFace for the type argument. The context and options arguments are optional, but you will typically provide it an options dictionary describing the accuracy level to use. This can be configured by defining a dictionary with the key CIDetectorAccuracy and a value of either CIDetectorAccuracyLow or CIDetectorAccuracyHigh. The high accuracy algorithm can produce far more accurate results, but takes significantly longer to perform the analysis. Depending on what you need to accomplish you may find the low accuracy setting produces acceptable results.


 Analyzing the Image

With a properly configured detector in hand you’re ready to analyze an image. You call the detector’s featuresInImage: method passing it an image to analyze. The Core Image framework doesn’t know anything about UIImage so you can’t directly pass it an image of this type, however, UIKit provides a category on CIImage making it easy to create an instance of CIImage from a UIImage.
UIImage *uiImage = [UIImage imageNamed:@"image_name"];
CIImage *ciImage = [[CIImage alloc] initWithImage:uiImage];
NSArray *features = [detector featuresInImage:ciImage];
The featuresInImage: method will return a collection of CIFaceFeature objects describing the features of the detected faces. Specifically, each instance defines a face rectangle, and points for the left eye, right eye, and mouth. It only defines the center point of each feature so you’d have to perform some additional calculations if you’d need to know the feature’s shape, angle, or relative location.


Visualizing the Results

The following images show examples of the face detection API in action. The images illustrate the differences between the low and high accuracy settings along with the approximate times it took to run the detection. The location of the detected features is not significantly different between the two images, but you’ll notice the high accuracy setting took more that 10x longer to compute on an iPhone 4. It will likely require a fair amount of testing of a representative set of images to determine the appropriate accuracy setting for your app.


I have put together a sample app containing images of several iconic faces. Flip through the images and run the analysis to see the face detection in action. You can run the sample on the simulator, but I’d recommend running it on your device so you can get a realistic sense for the performance. Enjoy!

Download iOS 5 Sample App: Sample Code

Friday, October 28, 2011

Checklist for Submitting an App to the App Store


Before you can release a paid app to the App Store, you must agree to all of the paid app contracts, and submit your tax and bank routing info. This should be done in iTunes Connect. For best results you should fill this out before you even begin working on any apps, because it can take several weeks for the contracts to be approved by Apple.

Preparation

1. Complete all of the coding and testing on your app.
2. Update the Info.plist file in your app.
  1. Set the bundle identifier (if you haven't already) to YourAppName. (Remove the com.apple.whatever stuff.) The Identifier should not contain spaces or funny characters - alphanumeric and dashes are ok.
  2. If you want your app to be named something different on the actual device than its name in Xcode, change the "Bundle display name" as well.
  3. Update the bundle version. If this is your first time submitting this app, the version number should probably be 1.0.
  4. Be sure the icon file is set.

3. Build the app for distribution.
4. Write a description for your app for the app store. The app upload page says the description should be 700 characters or less, but that limit doesn't seem to be enforced.
5. Choose a numeric SKU for your app. This can't be left blank, and it has to be a unique number for each of your apps. (I usually use YYMM, like 0902, but you can use whatever you want as long as it's a number.)
6. Assemble your screenshots. You'll need at least one primary screenshot, and up to four more secondary screenshots. Be sure they're the right size: 320 x 480 or 320 x 460 for standard resolution iPhone apps, 640 x 960 for high resolution. iPad screenshots should be 1024 x 768.
7. Prepare your iTunes artwork. This is a 512 x 512 pixel 72dpi JPEG. It should match your icon artwork as closely as possible - apps are sometimes rejected if these two images are dissimilar.
When you've got all that prepared, you're ready to set up your app in iTunes Connect.

iTunes Connect

When you log into developer.apple.com/iphone, there's a link to iTunes Connect on the right. Once you're logged into iTunes Connect, click on "Manage Your Applications", then "Add New Application".
The app details page asks for your app name, description, copyright info, version number, SKU, application URL and support URL and support e-mail address (all of these are required). The URLs you enter translate to:
iTunes Connect calls it: What it shows on your app's page in iTunes:
"Application URL" "CompanyName Web Site"
"Support URL" "Appname Support"
If this is your first time uploading an app to the app store, and you enrolled as an individual developer, you'll be asked if you want to set a Company Name. Think carefully about this - once you set it, you can NOT change it without calling Apple and going through their phone support line. If you set a company name then all of your apps will show it.
This is also where you should upload the iTunes artwork and screenshots.
Ratings: You'll be asked to rate your app by indicating whether it includes any offensive material.
Pricing and availability: this is where you set the price and release date for your app. You'll get a chance to review this after you select a pricing tier. The page should show a link to the pricing tiers, but if it doesn't show one initially, just set the price to anything and let it refresh. The link should show up then.

Free
Tier1 - 0.99
Tier 2 - 1.99
Tier 3 - 2.99
Tier 4 - 3.99
Tier 5 - 4.99
Tier 6 - 5.99
And so on.
Release date: This defaults to the current date, but you can set it to a date in the future* if you like. When your app is approved, you'll want to log back into iTunes Connect and reset the release date to the approval date; that way the app will show up at the top of the new releases section of its category. If you fail to do this, then when your app gets approved it'll show up buried several pages down - not very desirable.
*if you're submitting an app UPDATE, however, you shouldn't touch the release date until you get word that your update has been approved. If you change the release date of an update to sometime in the future, then your CURRENT app will vanish from the app store!
Once you've finished setting up info on your new app, go to the app details page and click on the Ready to Upload Binary button.

Uploading Your App

To upload your app binary to Apple, use the Application Loader app that's part of the developer applications. (You can find it in Developer->Applications->Utilities on your mac.) The Loader will guide you through the upload steps. If you can't find your app in the pull-down of available apps to upload, be sure you changed the status to "Waiting for Upload" (by clicking on the Ready to Upload Binary button) in iTunes Connect.
Once your app is uploaded, the status will change from "Upload Received" to "Waiting for Review". Now you just have to wait for Apple to review and (hopefully) approve your app. This usually takes about a week, sometimes longer. If you log into the iOS Developer Center and go to the App Store Approval Process page, you'll find an App Store Review Status section that Apple keeps (more or less) updated with the percentage of apps that are approved within the past week.
While you're waiting for approval, you should set up a web page for your app.

After Approval

When your app is approved, you'll get an email saying your app is ready for sale. You should log back into iTunes Connect and change your app's availability date to today. This way your app will appear at the top of the "new releases" list in its category. You can only do this on the date your app was approved.
You can change most of the app details any time after your app is approved; if you want to re-word the description, or upload new screenshots, or change the price of your app, you can do so without having to go through the approval process again. The only time you'll have to wait for approval is when you submit an update (a new binary) to an app. Also, you can only change keywords or ratings when you upload a new binary. 

Tuesday, August 9, 2011

How to build an Apple Push Notification provider server (tutorial)


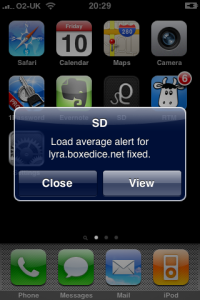
Server monitoring iPhone application alert view
As part of the product, we have an iPhone application that includes push notifications as an alerting option so you can be notified via push direct to your iPhone when one of your server alerts have been triggered. This is useful since our app can then be launched to instantly see the details of the server that has caused the alert.
Apple provides detailed code documentation for the iPhone OS code that is needed to implement and handle the alerts on the device but only provides a higher level guide for the provider server side.
As a provider, you need to communicate with the Apple Push Notification Service (APNS) to send the messages that are then pushed to the phone. This is necessary so that the device only needs to maintain 1 connection to the APNS, helping to reduce battery usage.
This tutorial will go into code-level detail about how we built our push notification provider server to allow us to interact with the APNS and use the push notifications with our server monitoring iPhone application. Since we develop in PHP, our examples will be in PHP 5.
Basic Structure
  1. You connect to the APNS using your unique SSL certificate
  2. Cycle through the messages you want to send (or just send 1 if you only have 1)
  3. Construct the payload for each message
  4. Disconnect from APNS
The flow of remote-notification data is one-way. The provider composes a notification package that includes the device token for a client application and the payload. The provider sends the notification to APNs which in turn pushes the notification to the device.
- Apple documentation
APNS Flow
Restrictions
  • The payload is limited to 256 bytes in total – this includes both the actual body message and all of the optional and additional attributes you might wish to send. Push notifications are not designed for large data transfer, only for small alerts. For example we only send a short alert message detailing the server monitoring alert triggered.
  • APNS does not provide any status feedback as to whether your message was successfully delivered. One reason for this is that messages are queued to be sent to the device if it is unreachable, however only the last sent message will be queued – overwriting any previously sent but undelivered messages.
  • Push notifications should not be used for critical alerts because the message will only be delivered if the device has wifi or cellular connectivity, which is why we recommend combining push with another alerting method such as e-mail or SMS for our server monitoring alerts.
  • The SSL certificates used to communicate with APNS, discussed below, are generated on an application level. The implementation discussed in this tutorial only concerns a single iPhone application so if you have several, you will need to adapt the code to use the appropriate certificate(s) where necessary.
Device Token
Each push message must be “addressed” to a specific device. This is achieved by using a unique deviceToken generated by APNS within your iPhone application. Once this token has been retrieved, you need to store it on your server, not within your iPhone application itself. It looks something like this:
c9d4c07c fbbc26d6 ef87a44d 53e16983 1096a5d5 fd825475 56659ddd f715defc
For the Server Density iPhone application, we call the necessary generation methods on app launch and pass it back to our servers via an HTTP API call. This stores the deviceToken in a database on our servers for that user so we can then communicate with the device linked to that user.
Feedback Service
Apple provide a feedback service which you are supposed to occasionally poll. This will provide a list of deviceTokens that were previously but are no longer valid, such as if the user has uninstalled your iPhone application. You can then remove the deviceToken from your database so you do not communicate with an invalid device.
Using the feedback service is not covered by this tutorial.
Certificates
The first thing you need is your Push certificates. These identify you when communicating with APNS over SSL.
Generating the Apple Push Notification SSL certificate on Mac:
  1. Log in to the iPhone Developer Connection Portal and click App IDs
  2. Ensure you have created an App ID without a wildcard. Wildcard IDs cannot use the push notification service. For example, our iPhone application ID looks something like AB123346CD.com.serverdensity.iphone
  3. Click Configure next to your App ID and then click the button to generate a Push Notification certificate. A wizard will appear guiding you through the steps to generate a signing authority and then upload it to the portal, then download the newly generated certificate. This step is also covered in the Apple documentation.
  4. Import your aps_developer_identity.cer into your Keychain by double clicking the .cer file.
  5. Launch Keychain Assistant from your local Mac and from the login keychain, filter by the Certificates category. You will see an expandable option called “Apple Development Push Services”
  6. Expand this option then right click on “Apple Development Push Services” > Export “Apple Development Push Services ID123″. Save this as apns-dev-cert.p12 file somewhere you can access it.
  7. Do the same again for the “Private Key” that was revealed when you expanded “Apple Development Push Services” ensuring you save it as apns-dev-key.p12 file.
  8. These files now need to be converted to the PEM format by executing this command from the terminal:
    openssl pkcs12 -clcerts -nokeys -out apns-dev-cert.pem -in apns-dev-cert.p12
    openssl pkcs12 -nocerts -out apns-dev-key.pem -in apns-dev-key.p12
  9. If you wish to remove the passphrase, either do not set one when exporting/converting or execute:
    openssl rsa -in apns-dev-key.pem -out apns-dev-key-noenc.pem
  10. Finally, you need to combine the key and cert files into a apns-dev.pem file we will use when connecting to APNS:
    cat apns-dev-cert.pem apns-dev-key-noenc.pem > apns-dev.pem
It is a good idea to keep the files and give them descriptive names should you need to use them at a later date. The same process above applies when generating the production certificate.
Payload Contents
The payload is formatted in JSON, compliant with the RFC 4627 standard. It consists of several parts:
  • Alert – the text string to display on the device
  • Badge – the integer number to display as a badge by the application icon on the device home screen
  • Sound – the text string of the name of the sound to accompany the display of the message on the device
  • This tutorial will only deal with the basics by sending a simple alert text string but this can also be another dictionary containing various options to display custom buttons and the like.
Creating the payload
Using PHP it is very easy to create the payload based on an array and convert it to JSON:
$payload['aps'] = array('alert' => 'This is the alert text', 'badge' => 1, 'sound' => 'default');
$payload = json_encode($payload);

Echoing the contents of $payload would show you the JSON string that can be sent to APNS:
{
     "aps" : { "alert" : "This is the alert text", "badge" : 1, "sound" : "default" }
}

This will cause a message to be displayed on the device, trigger the default alert sound and place a “1″ in the badge by the application icon. The default buttons “Close” and “View” would also appear on the alert that pops up.
For the Server Density server monitoring iPhone application, it is important for the user to be able to tap “View” and go directly to the server that generated the alert. To do this, we add an extra dictionary in of our own custom values:
$payload['aps'] = array('alert' => 'This is the alert text', 'badge' => 1, 'sound' => 'default');
$payload['server'] = array('serverId' => $serverId, 'name' => $name);
$output = json_encode($payload);

The custom dictionary server is passed to the application on the device when the user taps “View” so we can load the right server. The JSON looks like this:
{
     "aps" : { "alert" : "This is the alert text", "badge" : 1, "sound" : "default" },
     "server" : { "serverId" : 1, "name" : "Server name")
}

The size limit of 256 bytes applies to this entire payload, including any custom dictionaries.
The raw interface
Once an alert is generated within Server Density, the payload is built and then inserted into a queue. This is processed separately so that we can send multiple payloads in one go if necessary.
Apple recommends this method because if you are constantly connecting and disconnecting to send each payload, APNS may block your IP.
As described by Apple:
The raw interface employs a raw socket, has binary content, is streaming in nature, and has zero acknowledgment responses.
APNS Binary Format
Opening the connection
The PHP 5 code to open the connection looks like this:
$apnsHost = 'gateway.sandbox.push.apple.com';
$apnsPort = 2195;
$apnsCert = 'apns-dev.pem';

$streamContext = stream_context_create();
stream_context_set_option($streamContext, 'ssl', 'local_cert', $apnsCert);

$apns = stream_socket_client('ssl://' . $apnsHost . ':' . $apnsPort, $error, $errorString, 2, STREAM_CLIENT_CONNECT, $streamContext);

If an error has occurred you can pick up the error message from $errorString. This will also contain the details if your SSL certificate is not correct.
The certificate file is read in relative to the current working directory of the executing PHP script, so specify the full absolute path to your certificate if necessary.
Note that when testing you must use the sandbox with the development certificates. The production hostname is gateway.push.apple.com and must use the separate and different production certificate.
Sending the payload
At this point, the code we use loops through all the queued payloads and sends them. Constructing the binary content to send to APNS is simple:
$apnsMessage = chr(0) . chr(0) . chr(32) . pack('H*', str_replace(' ', '', $deviceToken)) . chr(0) . chr(strlen($payload)) . $payload;
fwrite($apns, $apnsMessage);

Note that the $deviceToken is included from our database and stripped of the spaces it is provided with by default. We also include a check to send an error to us in the event that the $payload is over 256 bytes.
$apnsMessage contains the correctly binary formatted payload and the fwrite call writes the payload to the currently active streaming connection we opened previously, contained in $apns.
Once completed, you can close the connection:
socket_close($apns);
fclose($apns);
php-apns
There is a free, open source server library that does all the above functionality called php-apns. We chose to implement it ourselves because it has a further dependancy on memcached, we do not want to rely on 3rd party code for large and critical aspects of our code-base and I am apprehensive about the suitability of PHP for running a continuous server process. We do all the above queue processing using our own custom cron system which runs every few seconds – that way PHP scripts do not need to be run as processes, something I’m not sure they were designed to do!
All done
That’s it! If you have any problems, post in the comments below and we’ll do our best to help out. Also, Stack Overflow is your friend.
Learn Objective C-in Windows


Installation: you should install all below mentioned software.
GNUstep MSYS System Required 0.25.1 none MSYS/MinGW System
GNUstep Core Required 0.25.0 none GNUstep Core
GNUstep Devel Optional 1.1.1 None Developer Tools


save all required source file into "GNUStep/home/user" (user - jfalexvijay) directories.

input:

"test.m"
#import

int main()
{
id a = [Object new];
printf("Welcome");
return 0;
}

"makefile"

include $(GNUSTEP_MAKEFILES)/common.ma​ke
TOOL_NAME = test
test_OBJC_FILES = test.m
include $(GNUSTEP_MAKEFILES)/tool.make

to compile:
$ gcc -o test test.m -I /GNUstep/System/Library/Header​s/ \-L /GNUstep/System/Li
brary/Libraries/ -lobjc -lgnustep-base

to run:
$ ./test.exe

output:

$ gcc -o test test.m -I /GNUstep/System/Library/Header​s/ \-L /GNUstep/System/Li
brary/Libraries/ -lobjc -lgnustep-base
Info: resolving ___objc_class_name_Object by linking to __imp____objc_class_name
_Object (auto-import)
c:/gnustep/mingw/bin/../lib/gc​c/mingw32/4.4.0/../../../../mi​ngw32/bin/ld.exe: wa
rning: auto-importing has been activated without --enable-auto-import specified
on the command line.
This should work unless it involves constant data structures referencing symbols
from auto-imported DLLs.

yourname@Test ~
$ ./test.exe
Welcome
yourname@Test ~
$

Friday, July 15, 2011

Do i really need a device to develop iPhone app?

You don't really need a device to develop. Mainly testing on the device is just so you know it's not slow, it works on the device too, and so you can test that your user interface is easy to use. Unless you are doing very memory intensive games, first one probably won't be an issue, not too many things will work on the simulator but not work on the device, and designing a user interface that looks good on a simulator but sucks on the actual device is unlikely. So yes, to develop you don't really need a device. To release to the app store, yes you need a device.

And you can buy Xcode 4 for $5 and the SDK is free.